Learning how to start prepping with no money is crucial for ensuring self-reliance during unexpected events. It teaches resourcefulness, prioritizing necessities, and utilizing available materials.
By focusing on skills, knowledge, and creativity, individuals can build a strong foundation for emergency preparedness.
This approach not only promotes a sense of security but also demonstrates that financial constraints should not deter one from taking proactive measures to safeguard their well-being and that of their loved ones.

how to start prepping with no money (A Step-By-Step Guide)
Prepping is about being prepared for anything. It’s about having the right mindset and knowing how to use your resources wisely. If you have no money, don’t let that stop you from starting your prepping journey!
The key thing here is determination and resourcefulness- the two qualities that will help get you through even the toughest situations when SHTF.
Now, let’s try to decode how to start prepping with no money for real.
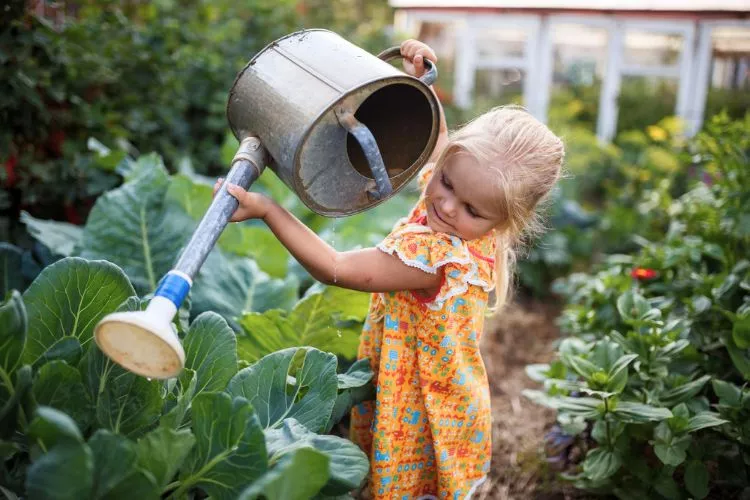
Step 1: Start Growing Your Food
Growing your food can be a rewarding and cost-effective way to take control of your food supply and reduce your grocery bill.
By planning carefully, using low-cost materials, and employing sustainable gardening practices, you can create a thriving garden that provides fresh, nutritious food while keeping your expenses to a minimum.

Choose the right space
Select a location for your garden with adequate sunlight (6-8 hours per day) and good drainage. Consider using space in your backyard, a community garden plot, or containers on a balcony or patio.
*If you don’t have enough space, try vertical gardening.
Select cost-effective crops
Focus on crops that are reliable, easy to grow, and produce a high yield for the space they require. Some great options include tomatoes, lettuce, spinach, beans, peas, and zucchini. Additionally, consider growing herbs like basil, cilantro, and parsley, which can be expensive.
Opt for heirloom seeds
Heirloom seeds are open-pollinated varieties that produce plants with similar characteristics to their parent plants. These seeds can be saved yearly, reducing the need to purchase new seeds each season.
Utilize low-cost or free materials
Instead of buying expensive planters and garden beds, consider using recycled materials such as wooden pallets, old tires, or even repurposed containers. You can also create your compost from kitchen scraps, reducing the need to purchase fertilizer.
Start seeds indoors
Starting seeds indoors can give your plants a head start and reduce the need to purchase seedlings. Use recycled containers, such as egg cartons or yogurt cups, as small seedling pots.
Practice companion planting
Companion planting involves placing certain plants close together to improve their growth and deter pests. This can help reduce the need for chemical pesticides and improve the overall health of your garden. Some examples of companion planting include planting basil with tomatoes or marigolds with beans.
Employ natural pest control methods
To minimize costs, use natural pest control methods such as introducing beneficial insects like ladybugs, DIY insecticidal sprays made from household items, or planting pest-repellent plants like marigolds or chives.
Practice succession planting
Succession planting involves planting crops in staggered intervals, so as one crop is harvested, another is ready to take its place. This can help maximize the use of garden space and provide a continuous supply of fresh produce throughout the growing season.
Step 2: Harvesting and Preserving Your Food
Harvest at peak ripeness: Harvest your crops at their peak ripeness to get the most nutritional and flavorful produce. Regular harvesting can also encourage plants to produce more.

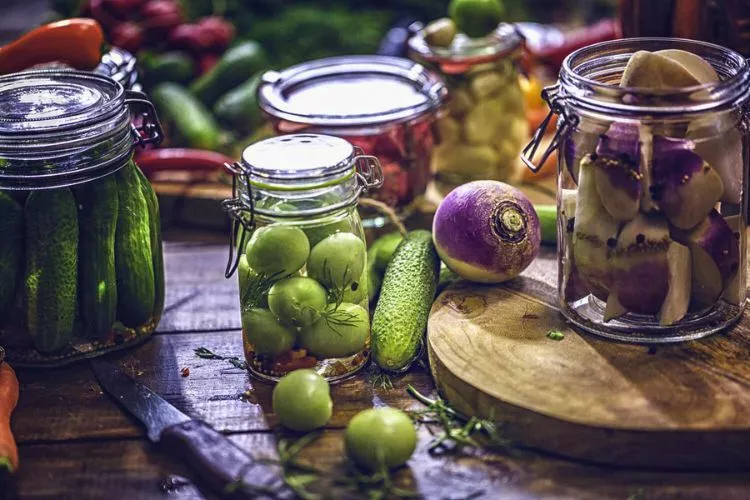
Preserve your harvest: Learn how to preserve your produce through canning, freezing, and dehydrating methods. This can help you enjoy your homegrown food year-round, reducing the need to purchase produce during the off-season.
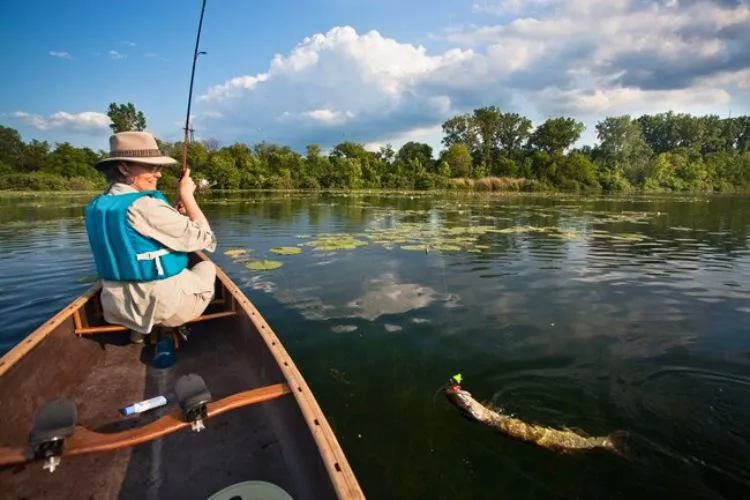
Step 3: Practicing Hunting and Fishing Techniques
You may have heard about different types of hunting–bowhunting, muzzleloading, duck hunting–but what exactly do they mean?

Well, first off, let me say that all these different types are just ways of describing how people use guns or bows (bows are also called crossbows) when they go out into nature looking for animals like deer or ducks respectively, so don’t worry too much about getting confused by all those terms just yet!
Just remember these three basic categories: gun-based, bow-based, and trapping/snaring (trapping involves setting traps). Ensure you have the necessary licenses and permits and follow all safety and ethical guidelines.
Hunting and Fishing in Different Seasons
The best time to hunt and fish is in the early spring when the weather is warm. This is also when most animals are pregnant and more likely to be out in the open.
However, if you cannot get out there during this season, don’t worry! You can still catch plenty of food by hunting or fishing later in summer or fall–just make sure that you keep an eye on changing weather patterns to know when it’s safe for both yourself and your prey/prey’s young ones.
Preparing and Cooking Your Catch
Now that you have your game, it’s time to prepare it for cooking.
If you’re eating the meat raw (like sushi), then this step isn’t necessary. However, if you want to cook your catch and make sure it’s safe for consumption, then follow these steps:
- Remove all fat from around the meat and discard it; this will keep your dish from becoming greasy or oily when cooked
- Cut off any excess sinew or gristle from around the outside of the meat–this will help prevent toughness during cooking
Step 4: Try to Get Clothes for Free
- Reach out to a nonprofit or charitable group near you. Those needing basic clothing or professional attire can seek help through shelters and non-profit organizations.
- Use referral programs from clothing sites. Several clothing companies offer referral programs where you can earn credits or cash by referring your friends. You can use these credits or cash to buy clothes for free.
- Search for clothing swaps. Clothing swaps are events where people bring their unwanted clothes to trade with others. You can find clothing swaps on social media or through local event listings.
- Check Craigslist and other sites. You can find free clothes on classified websites like Craigslist or Facebook Marketplace. People often give away clothes they no longer need, so it’s worth checking these sites regularly.
- Try product testing. Some companies offer free clothes in exchange for your feedback on their products. You can find these opportunities by signing up for product testing websites or contacting clothing companies directly.
Step 5: Create A Free Water Source For Personal Use
Materials Needed
To create a free water source, you will need the following materials:
- Containers: You will need containers to store the collected water. These can include barrels, tanks, or other large storage units.
- Pipes and tubing: These are required for transporting water from the source to the storage containers and distribution.
- Pumps: Depending on the distance and elevation of the water source, you may need a pump to help transport the water to your storage containers.
- Filters: Water filters are essential for ensuring that the water you collect is safe for consumption and use. These include sediment filters, activated carbon filters, and ultraviolet (UV) purification systems.
- Tools: You will need various tools for the construction process, such as shovels, drills, wrenches, and pipe cutters.
Choosing the Right Location
The location of your water source is crucial for ensuring a reliable supply of clean water. Consider the following factors when choosing a location:
- Proximity to a water source: Your chosen location should be near a natural water source, such as a river, stream, or well. This will make collecting and transporting water to your storage containers easier.
- Accessibility: The location should be easily accessible for regular maintenance, cleaning, and inspection. It should also be accessible in case of emergencies or repairs.
- Ground conditions: The ground should be stable and suitable for constructing your water source. Avoid areas prone to flooding, landslides, or other hazards.
- Legal considerations: Ensure you have the necessary permissions and permits to build your water source, especially on public or protected land.
Building the Water Source
Follow these steps to construct your free water source:
Assess the water source:
- Before starting construction, assess the water source to ensure it’s clean and suitable.
- Test the water for contaminants and pollutants.
- If necessary, consult with a water quality expert.
Prepare the site: Clear the area of debris and vegetation, and level the ground as needed. Ensure there is enough space for your storage containers and any additional equipment.
Install the piping: Lay out the pipes that will transport water from the source to your storage containers. Use a pump to help move the water uphill or over long distances if necessary. Secure the pipes with clamps or brackets.
Install the filters: Set up the water filtration system to ensure the water is clean and safe. This may include sediment filters, activated carbon filters, and UV purification systems. Follow the manufacturer’s instructions for proper installation.
Set up the storage containers:
- Position your storage containers near the end of the piping system.
- Make sure they are secure and stable.
- Connect the containers to the piping system, and install any necessary overflow or drainage systems.
Test the system: Turn on the pump (if applicable) and allow the water to flow through the pipes and filters into the storage containers. Check for leaks or issues, and make any necessary adjustments.
Step 6: Learn A Few Other Necessary Things

First Aid: Knowing basic first aid skills can be critical in survival. You’ll need to learn how to treat injuries, illnesses, and emergencies without access to medical professionals.
Self-Defence: In a survival situation, you may need to defend yourself and your resources. Learning basic self-defense skills can help you protect yourself and your family.
Communication: Having good communication skills can be critical in a survival situation. You’ll need to be able to communicate with others, both to exchange information and to build relationships with other preppers.
Adaptability: Surviving without money requires flexibility and adapting to changing circumstances. You’ll need to be willing to learn new skills, try new things, and adjust your plans as needed.
Frequently Asked Questions (FAQs)
How much money can you save by meal prepping?
Meal prepping can save you a significant amount of money, allowing you to buy food items in bulk and prepare meals in advance. According to a study by the American Heart Association, individuals who meal prep save an average of $58 per week on food expenses.
Is it a good idea to start prepping?
Starting a prepping routine can be a good idea, as it helps you become more self-reliant and prepared for emergencies. By stocking up on essential items such as food, water, first aid supplies, and other necessities, you can increase your chances of surviving a disaster.
What are the best foods to stock up on for prepping?
The best foods to stock up on for prepping are non-perishable items that have a long shelf life and provide essential nutrients. These include canned goods, dried foods like beans and rice, pasta, nuts, seeds, and grains. It’s also important to stock up on water and consider buying a water filtration system. Don’t forget to rotate your stockpile regularly to maintain freshness.
How much food is needed for prepping?
The food needed for prepping depends on the duration you’re planning for and the number of people in your household. A common recommendation is to start with a 2-week supply of non-perishable food items per person, which includes grains, canned goods, and dried foods. However, if you’re prepping for potential emergencies, it’s advised to have at least a 30-day supply of food. Consider your family’s dietary preferences, calorie requirements, and allergies when selecting the appropriate food items for prepping.
Exploring Bartering and Trading
In a scenario where financial resources are limited, bartering and trading can be invaluable skills to possess. Even without money, individuals can still obtain necessary items and resources by leveraging their own skills and surplus goods.
Bartering involves exchanging goods or services directly, without the involvement of currency, while trading involves swapping items or services for mutual benefit.
Here are some strategies to engage in bartering and trading without money:
- Identify Your Skills and Resources: Assess your own skills and the surplus items you possess, such as homemade crafts, homegrown produce, or non-monetary assets like tools or equipment.
- Engage with the Community: Connect with local community groups, social media platforms, or neighborhood gatherings to identify potential bartering opportunities. Offer your skills or surplus goods in exchange for items or services that align with your needs.
- Seek Out Barter Exchanges: Explore existing barter exchanges or trade networks within your community or online platforms. These platforms facilitate the exchange of goods and services without cash transactions, promoting a sense of community and resourcefulness.
- Establish Clear Terms and Agreements: When engaging in bartering or trading, clarity and mutual understanding are crucial. Clearly outline the items or services being exchanged, establish fair value, and agree upon the terms of the trade to ensure a mutually beneficial arrangement.
By embracing the principles of bartering and trading, individuals can broaden their access to essential resources, diversify their supplies, and foster a spirit of collaboration within their community. These practices not only contribute to self-sufficiency but also cultivate a supportive network that can be instrumental in navigating challenging circumstances.
Including this section will provide an additional dimension to the article, addressing the practical aspects of resource acquisition and collaboration in a resource-constrained situation.
Feel free to edit or expand on this information to align it with your article’s tone and focus.
Conclusion:
In short, it’s not that difficult to learn how to start prepping with no money. You just need to arrange your food, clothes and a few other necessary things, and that can be done if you implement the tips that I mentioned in this article.
However, it’s important to note that raising non-vegetarian food can be more complex and involved than growing vegetables and may require more time, resources, and knowledge.
However, if done responsibly and sustainably, it can provide high-quality, nutrient-dense food for you and your family.


