Amidst rising storms, the fierceness of wild nature uncovers itself. Venturing outdoors may seem daunting in such harsh conditions.
Yet, the passionate explorer knows the art of turning challenges into assets. One of the key essentials? A well-pitched tarp.
When properly set up, this life-saving piece of gear can withstand menacing winds, providing a necessary shield.
In this article, we will unlock the secrets of how to pitch a tarp to survive heavy winds properly, ensuring survival even in the most demanding weather.
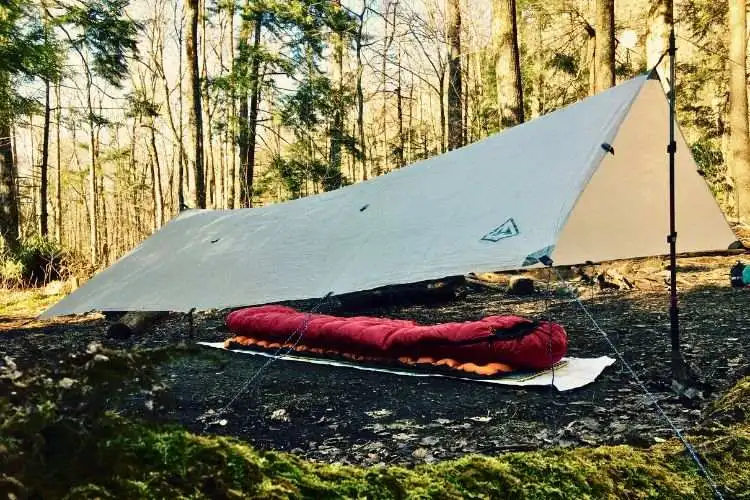
How to Pitch a tarp to survive heavy winds (easy guide)
Venturing outdoors in heavy wind poses unique challenges, but with a well-pitched tarp, you can create a refuge from the elements.
Below, we’ve compiled a detailed guide to help you learn how to pitch a tarp to survive heavy winds and turn this simple gear into a fortress against the fiercest winds.
Choosing Your Tarp
It’s vital to begin with a durable, high-quality tarp to weather the storm. Preferably, choose a tarp made of rip-stop nylon or polyester, known for its strength and waterproof qualities.
Reinforced eyelets, usually consisting of metal grommets or looped webbing, are a must-have for enhanced durability.
The size of your tarp depends on your specific needs: how many people it needs to shelter, additional equipment, and how much weight you’re willing to carry. A common suggestion for a versatile, multi-person shelter is a tarp measuring 3m by 3m.
Picking The Right Spot
Location selection is vital for any outdoor setup. When positioning your tarp, aim to take advantage of natural wind shelters—think dense shrubs, tree lines, or hillsides.
But be mindful of potential hazards like weak or dead trees, which pose a risk of falling branches.
The terrain plays a role, too: look for ground that’s not only flat but also free from rocks and roots for a more comfortable sleep. Avoid areas prone to flooding or wind funnels unless protective measures against these are feasible.
Gathering The Essentials
Properly pitching a tarp requires a few essential pieces of equipment:
- Paracord Ropes or Sturdy Nylon Ropes: Parachute cords or similarly durable ropes are integral to a secure tarp setup. Aside from holding your tarp in place, they also add flexibility and stability.
- Tent Pegs or Stakes: Tent pegs grip the ground securely. They can be made from various materials, including metal or plastic, and vary in length. The tougher the ground, the more robust the stake needed.
- Optional: Poles for Added Support: Depending on your preferred tarp configuration and weather conditions, you might need poles to prop up your tarp for added stability or to create more internal space.
Remember, every trip is unique. Tailor your gear according to the specific conditions and challenges you expect to face, but don’t forget the staples.
Pitching Your Tarp
In this section, we’ll delve deeper into the process of setting up your tarp:

Diamond Fly Configuration
For maximum wind resistance, orient your tarp in a diamond shape, with one corner facing the wind’s direction. This setup reduces the surface area exposed to the wind, lessening the strain on your tarp. Ensure that the corner facing the wind is anchored as low as possible.
Attach Ropes
Ropes are crucial for securing your tarp. Tie them to your tarp’s corner eyelets using a resilient bowline knot or a taut-line hitch knot – both known for their strength and adjustability.
Then, extend the ropes either to sturdy trees, if available, or to tent stakes hammered deep into the ground at a 45-degree angle away from the tarp for enhanced anchoring.
Adjustments
Ensure all ropes are pulled taut for maximum wind resistance; a saggy tarp flaps violently in the wind, causing damage to the tarp and reducing its stability.
However, avoid over-tensioning, as it could tear your tarp. Use a trucker’s hitch knot for adjustments – it has the advantage of being easy to tighten or loosen and staying secure under load.
Extra Wind Resistance
Upping your tarp’s wind resistance is a good strategy in cases where winds are very strong. You can pile large rocks or logs around the edges of your tarp to provide further reinforcement.
Doing so acts as a windbreak and adds more anchor points to your setup, reducing any tendency for the tarp to billow or lift.
Optional: Adding Poles
Consider using poles in the center or corners of your tarp setup for additional space and improved stability. Poles can be sourced from your surroundings (strong, straight branches), or you can pack lightweight, telescopic poles.
If using natural poles, ensure they have no sharp points that may damage your tarp. The advantage of poles is that they prop the tarp up, creating a more spacious shelter and reducing stress on its fabric in windy conditions.
Remember: Each outdoor situation is unique; conditions may require tweaks or variations to this guide. However, mastering these foundational techniques gives you the skills to create a shelter capable of withstanding even heavy winds.
Double-check Your Setup
After setting up your tarp, it’s crucial to double-check each element to ensure stability:
- Inspect all corners: Make sure each corner is securely pegged down and ropes are tight.
- Check the ropes: Look for loose lines or knots that could slip under tension. Retying or tightening may be needed for optimal setup.
- Inspect your tarp: Search for wrinkles, saggy sections, or uneven tension across the tarp. These could be early signs of instability and may indicate that additional adjustments are required. Wind can exploit these weaknesses, causing damage or collapsing your shelter.
- Test Stakes: Ensure stakes are deeply embedded in the ground and at an angle away from the tarp, providing a firm anchor.
- Check the Surrounding: Ensure the wind hasn’t picked up any debris that could potentially fly into your shelter and cause damage or injury.
Every detail regarding a reliable shelter in adverse weather matters, so make sure to conduct this step keenly.
Leaving The Campsite
Practicing Leave No Trace principles is critical for preserving the outdoors for future generations. When you’re ready to leave, do so responsibly:
- Pack Up: Carefully take down your tarp, fold it neatly, and pack it with your ropes and stakes. Check whether they need cleaning or drying before storage.
- Clean Up: Scan the area for trash or items that don’t occur naturally at the campsite. This includes food scraps, packaging, and waste. Pack these out to dispose of properly later.
- Natural Look: The goal is to leave the place looking like no one ever camped there. If you moved any rocks or branches while setting up, replace them in their original positions.
Respecting nature should be the core principle behind each wilderness trip. It ensures that beautiful outdoor spaces remain that way for generations to come.
How do you secure a tarp on a roof in high winds?
Securing a tarp on a roof in high winds involves some key steps for effective coverage and endurance:
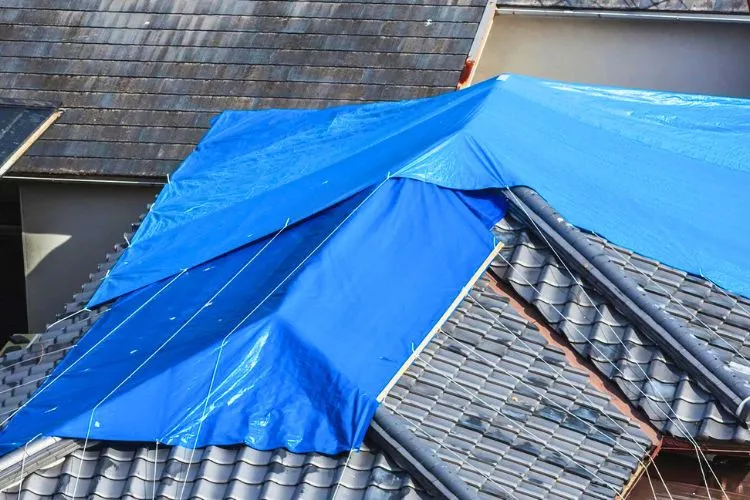
- Assess the Damage: Before any action, assess the extent and nature of the damage. Clear any debris from the area to give you a clean and safe working environment. Safety is paramount in such situations, so use appropriate safety gear, including gloves, goggles, protective clothing, and sturdy boots.
- Gather Materials: You’ll need specific tools and materials, including a ladder, safety equipment, a suitably-sized tarp, thin wooden boards (2x4s or thinner if possible), a tool such as a roofing shovel or broom to remove debris, and fasteners like nails or screws.
- Examine and Measure: Use a tape measure to ascertain the exact dimensions of the damaged area. This will help you decide on the appropriate size of the tarp. Always choose a tarp that extends beyond the damaged area to ensure comprehensive coverage.
- Secure the Tarp: Start by laying it over the damaged area, ensuring it extends over the roof peak. Use 2x4s or thinner wooden boards on the tarp edges to secure it; you can achieve this by nailing or screwing through the tarp and boards into the roof. This technique helps to distribute the force exerted on the tarp by the wind, reducing the risk of tearing.
Take note, securing a tarp in high winds can be particularly challenging and risky, considering the height and weather conditions. If the situation seems beyond your capacity, it’s advisable that professionals are consulted to prevent accidents or further damage to the roof.
How to keep a tarp from ripping in the wind?
Sure, preventing a tarp from tearing in high wind conditions involves several critical strategies:

- Selection of Tarp Material: Using tarps made from durable materials, such as thick nylon, polyethene, or canvas, increases resilience against intense wind conditions. Ensuring the tarp has reinforced edges and sturdy grommets further enhances its resistance to ripping].
- Secure Anchoring: Using robust ropes, bungee cords, or ratchet straps to secure your tarp tightly to a firm structure – such as poles or trees – can prevent the wind from getting underneath and causing damage. Fastenings should be spread evenly across the tarp to distribute the wind load and reduce tear risks.
- Avoid Knots on Tarp: Tying knots directly onto the tarp should be avoided as it can cause stress points that might lead to tearing. Instead, knots should be tied on the ropes attached to the tarp.
- Add Extra Support: Additional anchoring points can help prevent damage from gusty wind lifting the tarp edges. Using bungee straps in combination with ratchet straps can be particularly effective.
- Appropriate Positioning: Configuring the tarp setup with careful consideration to wind direction can assist in reducing wind resistance.
Be mindful that your tarp’s longevity depends on many factors, including not just the method of setup but also the quality of materials and maintenance routines employed.
How much wind can a tarp withstand?
Its material quality largely determines the wind resistance level of a tarp and how it is secured. When correctly installed, a heavy-duty polyethylene tarp can endure wind speeds of about 40-50mph.
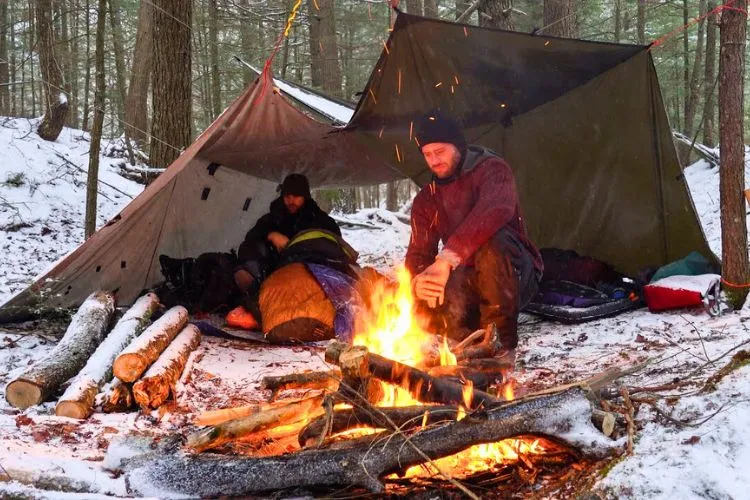
However, factors like the tarp’s overall size and the angle to which it is exposed to the wind also substantially influence its ability to withstand wind. For instance, a flat-laid tarp with secure corners can bear more wind pressure than a tarp hanging vertically or at an angle with exposed surfaces.
Moreover, the tarp’s durability diminishes over time and exposure to various elements, meaning an older tarp will likely have less wind resistance than a new one of the same make and material.
This is why regular checks and maintenance of the tarp are crucial to maximizing its wind endurance capabilities.
What material is most wind-resistant?
When considering wind resistance, several materials exhibit standout qualities:
- Ripstop Nylon: This lightweight material is specially woven to resist tearing or ripping. The wind-resistance property is complimented by its added benefits of being water and UV resistant. It’s popular for high-performance applications like parachutes, yacht sails, kites, and high-quality camping equipment.
- Polyester: Similar to ripstop nylon, polyester is durable, abrasion-resistant, and withstands the wind effectively. It is used extensively in outdoor gear, apparel, banners, and heavy-duty industrial applications.
- Canvas: Traditionally made from hemp, modern canvas is usually manufactured from cotton or linen. While it’s heavier than nylon or polyester, its robustness adds wind resistance, making it suitable for sails, tents, and marquees.
A key point to note is that the fabric’s weave and weight can substantially impact wind resistance. A tight weave and heavier weight often equate to higher wind resistance.
Note: While these materials commonly show excellent wind resistance, the overall quality of the product, including construction methods, finishing, and maintenance, is important in determining the ultimate resistance to wind.
Conclusion:
Pitching a tarp effectively to withstand heavy winds is a critical survival skill. The choice of tarp material, the correct anchoring techniques, and proper positioning can significantly enhance its wind endurance.
Remember, the objective is to evenly distribute the wind load across the tarp to reduce the potential for tearing.
Continuous maintenance and monitoring of the installation are also crucial.
Whether you are out camping or need to protect a roof from a storm, a well-set tarp can serve you excellently, standing against wind forces and protecting you from the elements.


